Polyurea concrete floor coatings are known for their fast curing time, durability, and sleek finish but like any flooring material, they’re not completely problem-free. While polyurea offers excellent protection against chemicals, UV rays, and wear, improper installation or poor surface prep can lead to issues like bubbles, peeling, or uneven texture.
Understanding these challenges early can save you time and costly repairs down the line. In this article, we’ll cover the most common problems with polyurea concrete floor coatings, why they happen, and how to prevent them, so you can get the long-lasting, professional results you expect.
The Bonding Problem That Ruins Most Installations
Polyurea’s incredible strength becomes its weakness when it comes to concrete adhesion. Unlike epoxy, which has hours to penetrate concrete pores, polyurea grabs onto whatever surface it touches within seconds.
Why does this cause problems?
If your concrete has even microscopic contamination (oil residue, efflorescence, dust particles, or old sealers), the polyurea bonds perfectly to that contamination instead of the concrete. Within weeks or months, the contamination releases from the concrete, taking your expensive polyurea coating with it.
What delamination looks like:
- Coating lifts in sheets or bubbles
- Edges curl and peel away from the walls
- Entire sections can be pulled up by hand
- Typically starts in high-traffic zones
The brutal truth: You can’t fix bonding issues after application. The coating must be removed and reapplied (a complete do-over that doubles your costs).
Preventing Adhesion Failures
Professional installers spend 70% of prep time on bonding preparation:
Step 1: Mechanical profiling. Diamond grinding creates the concrete surface profile (CSP)that polyurea needs. Shot blasting works too. Acid etching alone doesn’t cut it (polyurea needs aggressive mechanical preparation).
Target profile: CSP-3 to CSP-5 (visible aggregate exposure)
Step 2: Contamination testing. Drop water on the concrete. If it beads up instead of soaking in, you’ve got sealer or oil contamination. These areas need solvent degreasing or shot blasting to bare concrete.
Step 3: Moisture testing. Conduct calcium chloride moisture vapor emission testing. Polyurea can handle more moisture than epoxy, but excessive vapor pressure still causes delamination.
Acceptable limits: Below 3 lbs per 1,000 sq ft per 24 hours
Step 4: Priming protocol. High-quality polyurea primers create a chemical bridge between concrete and topcoat. Skip this step and you’re gambling with adhesion (especially on older concrete or previously sealed surfaces).
Air Bubbles: The Curse of Fast-Curing Systems
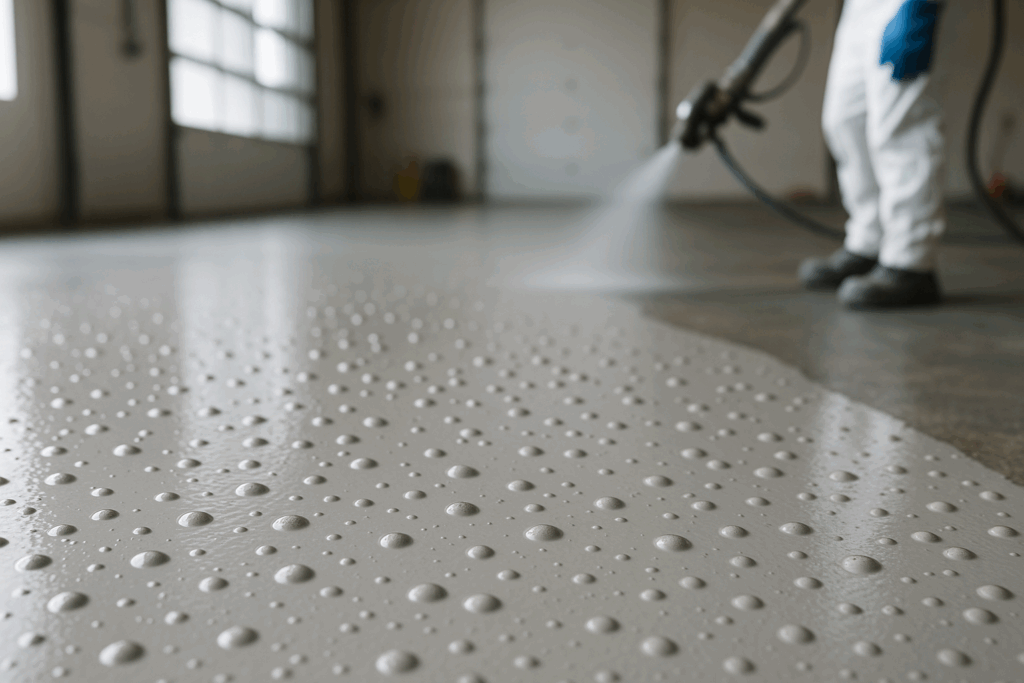
Watch a polyurea installation and you’ll see installers working at breakneck speed. There’s a reason: they’re racing against chemistry.
The physics problem:
Polyurea’s rapid exothermic reaction generates heat while curing. This heat warms trapped air pockets, causing them to expand and rise through the coating. But here’s the catch: the coating skins over in seconds, trapping those bubbles permanently beneath the surface.
Where bubbles come from:
- Air in mixing equipment
- Porous concrete releasing trapped air
- Too-thick application in a single pass
- High humidity is causing moisture bubbles
- Spraying technique introducing air
Visual impact: Small bubbles (pinholing) create a rough, pitted surface. Large bubbles form visible raised bumps that eventually crack and expose raw concrete underneath.
Bubble Prevention Strategies
Equipment matters: Plural-component spray equipment with heated hoses prevents material viscosity issues that cause air entrapment. The $15,000+ equipment cost is why most DIY installations fail (you can’t achieve professional results with bargain tools).
Application technique:
- Apply polyurea at 60-100 mils thickness maximum per coat
- Multiple thin coats beat single thick coats every time
- Maintain 70-90°F substrate temperature
- Use defoaming additives in the primer coat
- Back-roll immediately after spraying (when possible)
Primer selection: Low-viscosity penetrating primers displace air from concrete pores before topcoat application. This single step eliminates 80% of bubble problems.
The Mixing Ratio Nightmare
Two-part polyurea systems require precise ratios (typically 1:1 by volume). Sounds simple until you factor in temperature effects, equipment calibration, and material viscosity.
What happens with wrong ratios:
Too much Part A (resin):
- Coating stays soft and tacky
- Never achieves full hardness
- Attracts dirt and staining
- Reduced chemical resistance
Too much Part B (catalyst):
- The coating becomes brittle
- Prone to cracking under stress
- Shortened pot life during mixing
- Potential delamination
The temperature factor:
Material viscosity changes dramatically with temperature. Cold material flows thick; warm material flows thin. This affects pumping ratios even with calibrated equipment.
Professional solution: Heated plural-component spray rigs maintain both components at precise temperatures (typically 160-180°F), ensuring consistent ratios regardless of ambient conditions.
DIY reality: Hand-mixing two-part polyurea is nearly impossible. The 5-15 second pot life means you’ll barely finish mixing before it starts to gel. By the time you pour and spread it, you’ve got a lumpy mess.
UV Fading: The Outdoor Achilles Heel
Polyurea’s phenomenal physical properties don’t extend to UV stability. Exposed to direct sunlight, most polyurea formulations yellow, fade, and eventually chalk within 1-3 years.
The chemistry behind UV damage:
Aromatic polyurea (the affordable type) contains chemical bonds that break down under UV radiation. This photodegradation creates visible color changes and surface erosion.
What UV damage looks like:
- Yellowing (especially noticeable on light colors)
- Color fading and loss of gloss
- Surface chalking (powdery residue)
- Micro-cracking in advanced stages
Indoor vs. outdoor performance:
Indoor applications: Polyurea maintains appearance for 15-20+ years. Covered outdoor areas: 10-15 years typical lifespan.n Full sun exposure: 3-5 years before obvious degradation
UV Protection Options
Aliphatic polyurea: Premium aliphatic formulations resist UV damage significantly better than aromatic versions. Expect to pay 40-60% more, but the outdoor appearance lasts 10-15 years instead of 3-5.
UV-blocking topcoats: Aliphatic polyurethane or polyaspartic clear coats protect aromatic polyurea base layers. This two-layer system combines polyurea’s durability with superior UV resistance.
Cost comparison:
- Aromatic polyurea: $4-7 per sq ft
- Aliphatic polyurea: $7-12 per sq ft
- Aromatic + UV topcoat: $6-10 per sq ft
Smart approach: Use aromatic polyurea for the structural base (90% of thickness), then apply a thin aliphatic topcoat for UV protection.
Moisture Sensitivity During Application
Polyurea tolerates moisture better than epoxy after curing, but it’s extremely sensitive to moisture during application and cure.
The isocyanate reaction:
Part B of polyurea systems contains isocyanate compounds. These react violently with water, creating carbon dioxide bubbles that ruin the coating.
Moisture sources that cause failures:
- High humidity (above 85% relative humidity)
- Damp concrete substrate
- Condensation on cold surfaces
- Rain or dew during application
- Moisture in compressed air lines (spray equipment)
What moisture contamination creates:
- Surface bubbling and blistering
- Reduced adhesion strength
- Soft, spongy areas in the coating
- Foamy appearance
- Complete cure failure in severe cases
Moisture Management Protocol
Environmental control:
Ideal application conditions:
- Substrate temperature: 70-90°F
- Ambient temperature: 60-95°F
- Relative humidity: Below 85%
- No rain/dew in the forecast for 24 hours
Substrate moisture testing:
Use calcium chloride tests or relative humidity probes to verify concrete moisture levels. Even if the surface appears dry, internal moisture can cause problems.
Critical timing:
Apply polyurea during temperature rise periods (morning to afternoon), never during cool-down (evening). Falling temperatures cause condensation on the coating surface.
Compressed air quality:
Professional spray equipment includes inline air dryers and filters. Moisture in spray air causes immediate coating defects as it exits the gun.
Polyurea vs. Epoxy: When to Choose Which
The polyurea vs. epoxy debate misses the point (they excel in different applications).
Choose Polyurea When:
Fast turnaround is critical:
- Retail stores that can’t close for days
- Industrial facilities with limited maintenance windows
- Projects with weather concerns
- Any application requiring a same-day return to service
Flexibility is required:
- Substrates with movement or vibration
- Thermal cycling environments
- Impact-prone areas
- Expansion joints and control joints
Temperature extremes exist:
- Freeze-thaw cycle exposure
- High-temperature environments (up to 350°F)
- Rapid temperature changes
- Cold storage facilities
Chemical resistance is critical:
- Automotive service bays
- Manufacturing facilities
- Chemical processing plants
- Agricultural buildings
Choose Epoxy When:
Budget is limited: Epoxy costs 30-50% less than polyurea for equivalent coverage.
DIY installation planned: Epoxy’s 30-45 minute working time forgives mistakes. Polyurea demands professional expertise.
UV exposure is constant: Standard epoxy with UV-stable topcoat outperforms aromatic polyurea outdoors.
Decorative options matter: Epoxy offers metallic effects, color flakes, and design flexibility that polyurea can’t match.
Thick build is required: Epoxy can be applied 60-125+ mils in a single coat. Polyurea typically maxes at 60-100 mils per pass.
The True Cost of Polyurea Coatings
Global polyurea market growing at a 10.1% CAGR through 2028 (driven by performance advantages despite higher costs).
Material Costs Breakdown
Aromatic polyurea:
- Material only: $4-7 per sq ft
- Professional installation: $8-15 per sq ft total
- Premium decorative finishes: $12-20 per sq ft
Aliphatic polyurea:
- Material only: $7-12 per sq ft
- Professional installation: $12-22 per sq ft total
- High-performance systems: $18-30 per sq ft
Cost drivers:
- Square footage (economies of scale apply)
- Surface condition (extensive prep increases cost)
- Number of coats required
- Color and decorative options
- Geographic location and labor rates
Maintenance Requirements for Longevity
Polyurea’s “set it and forget it” reputation is partly true (but only with appropriate maintenance).
Daily and Weekly Care
Routine cleaning protocol:
- Sweep or vacuum daily (grit causes abrasion)
- Damp mop weekly with pH-neutral cleaner
- Immediate spill cleanup (even chemical-resistant coatings appreciate prompt attention)
- Avoid harsh acids or strong alkalis
What to never do:
- Steam cleaning (can delaminate coating)
- Metal scrapers or steel wool
- Solvent-based cleaners (unless specifically approved)
- Abrasive scrubbing pads
Long-Term Maintenance Schedule
Annual inspection:
- Check for adhesion issues around edges
- Look for wear patterns in high-traffic zones
- Identify UV damage if applicable
- Address minor damage before it spreads
Every 5-7 years:
- Light buffing to restore gloss (if worn)
- Reapplication of UV topcoat (outdoor installations)
- Deep cleaning to remove embedded contamination
10-15+ years:
- Evaluate for recoating vs. replacement
- Most polyurea lasts 15-20 years before requiring attention
- Recoating (if substrate adhesion remains good) costs 50-60% of new installation
Making the Right Choice for Your Project
Decision Matrix
Polyurea makes sense if:
- You need a rapid return to service (hours, not days)
- The environment involves chemicals or extreme temperatures
- Flexibility and crack bridging are required
- Budget allows for professional installation
- Long-term performance justifies a higher upfront cost
Consider alternatives if:
- The budget is extremely limited
- DIY installation is planned
- Decorative appearance is the primary concern
- Standard epoxy would meet performance needs
- UV exposure is constant (unless using aliphatic)
Final Thoughts
Polyurea is the right choice for demanding environments where performance justifies premium pricing (but only when installed by experienced professionals with proper equipment). For everything else, epoxy offers better value and more forgiving installation.
Know what you’re getting into, budget appropriately, hire qualified installers, and polyurea will deliver decades of outstanding performance. Cut corners and you’ll join the ranks of property owners who learned this lesson the expensive way.